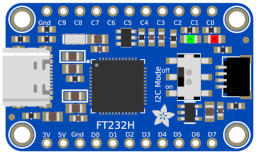
General setup
Note, that before we install Python specific packages via pip, the virtual environment venv will be activated first.
brew install libusb
source venv/bin/activate
pip install pyftdi
pip install adafruit-blinka
Set environment variable for using the FT232H module:
export BLINKA_FT232H=1
Test installation (the FT232H should be connected to the USB port):
python
>>> import board
No errors should be shown after the import command!
Another test, if the environment is set correctly. Console should print 1 on screen.
python
>>> import os
>>> os.environ["BLINKA_FT232H"]
- Reference: https://learn.adafruit.com/circuitpython-on-any-computer-with-ft232h/overiew
- Good FTDI Project: https://iosoft.blog/ftdi-python/
Troubleshooting
Check wether your Python installation is able to ‘see’ the connected FT232H via USB:
python3
>>> import usb
>>> print(usb.core.find())
Another check:
python3  # or 'python' on Windows
>>> from pyftdi.ftdi import Ftdi
>>> Ftdi.show_devices()
Remark: Don’t use Python version 3.8 which comes with Xcode 14.x. Install your own version, e.g. via homebrew! Otherwise you’re going to get ‘No backend available’ error messages.
I found the following discussion about support for multiple FT232H devices:
- https://github.com/adafruit/Adafruit_Blinka/issues/260
Virtualenv
Installation
pip3 install virtualenv
You may be prompt for agreeing to Xcode license. This can be done manually:
sudo xcodebuild -license
Side notes: Possible installation warnings and information:
 WARNING: The script virtualenv is installed in '/Users/$USER/Library/Python/3.8/bin' which is not on PATH.
 Consider adding this directory to PATH or, if you prefer to suppress this warning, use --no-warn-script-location.
 Successfully installed distlib-0.3.4 filelock-3.7.1 platformdirs-2.5.2 virtualenv-20.14.1

WARNING: You are using pip version 20.2.3; however, version 22.1.2 is available.
 You should consider upgrading via the '/Applications/Xcode.app/Contents/Developer/usr/bin/python3 -m pip install --upgrade pip' command.
On macOS (at time of writing: Monterey) you should add the path to virtualenv manually to your search path. To do this, you could add following lines to end of ~/.zshrc (this file should have been created for you when you have installed oh-my-zsh on your Mac):
# Customization
export PATH=$PATH:$HOME/Library/Python/3.8/bin
Workflow
activate & deactivate virtualenv
source <venv>/bin/activate
deactivate
Create virtualenv
virtualenv <name>
